Would you want to choose a certain sound as your iPhone’s ringtone or your favorite music as your ringtone? Well, you’re where you need to be. You may find detailed instructions for how to download ringtones on IPhone for free using iTunes in this extensive tutorial.
Any sound may be used, provided that it is available as an audio file on your laptop or iPhone.

Download free ringtones for iPhone
It’s essential to understand that because the songs are protected, you cannot utilize any music from Apple Music or other streaming services. You must instead use an audio file without digital rights management (DRM). Downloading audio files from https://ringtonecc.com/ is one of the simplest methods to obtain them.
We’ll walk you through downloading a song, turning it into a ringtone, and switching your iPhone’s default ringtone to the new one. The best part is that your songs don’t just have to be used as ringtones; you can also use them as notification sounds for text messages or other purposes.
Install Free IPhone Ringtones
Choose your favourite song and set it as your free IPhone ringtones using iTunes
Prepare your song
After deciding on the music or audio you want, the first thing to do is import it into your computer’s iTunes library.
Simply ensure that you are running the most recent version of iTunes (visit the Mac App Store or the Microsoft Store on Windows 10) and then open it by double-clicking the shortcut or by looking for it in the Start menu.
To import a file or folder, select File > Add File to Library or Add Folder to Library and then go to the chosen place.
Click on the album in the Library that includes the song or audio file you wish to use as a ringtone, then use the right-click menu to choose Song Info.
Choose timings
how to get free ringtones on iphone
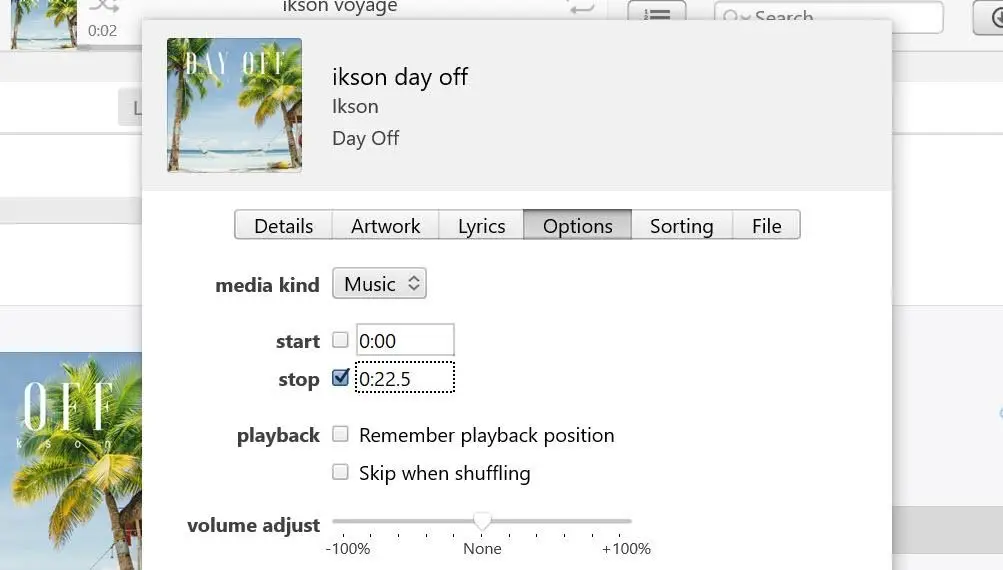
Click on the Options tab in the new window that appears, then check the boxes next to Start and Stop. Enter the start and stop times for the ringtone in text form. There’s no need to check the Start option if you want the music to begin at the beginning.
Keep in mind that a ringtone can only last for 30 seconds.
To close the window after setting the start and stop timings, click OK.
Create AAC version
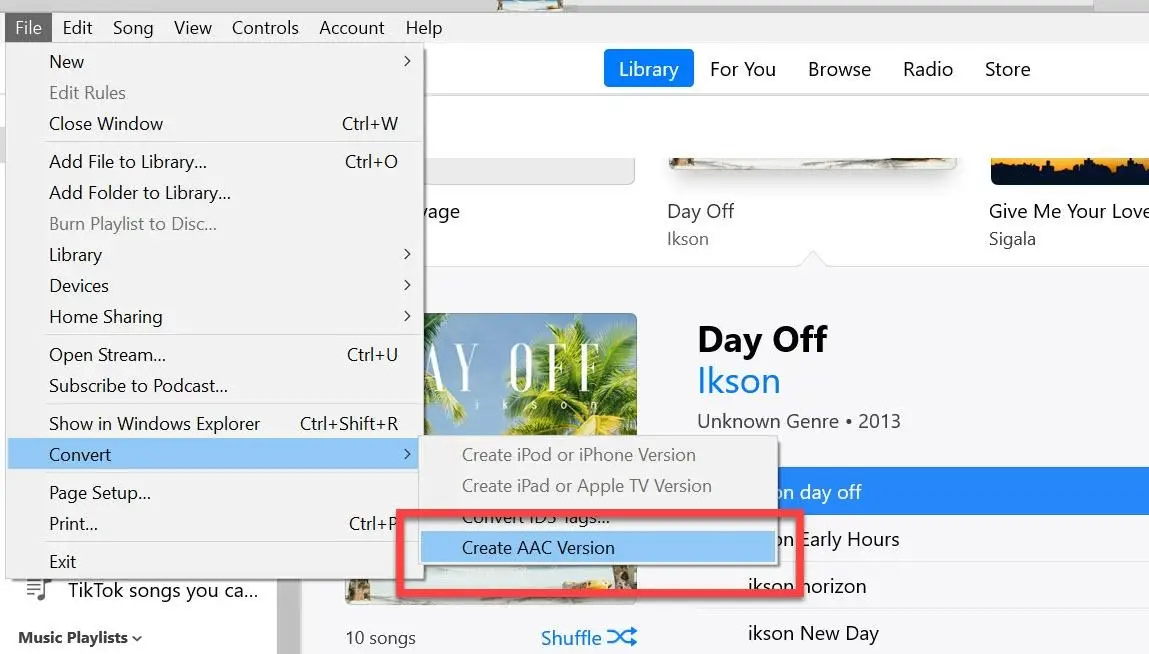
Select the music once again by clicking it now. Then select Convert from the File menu, followed by Create AAC version. (The remedy is in next step if you see “Create MP3 version” or something else.)
When you choose to create a new track in your Library, iTunes will only store the verses between the start and end timings you specified.
AAC Encoder
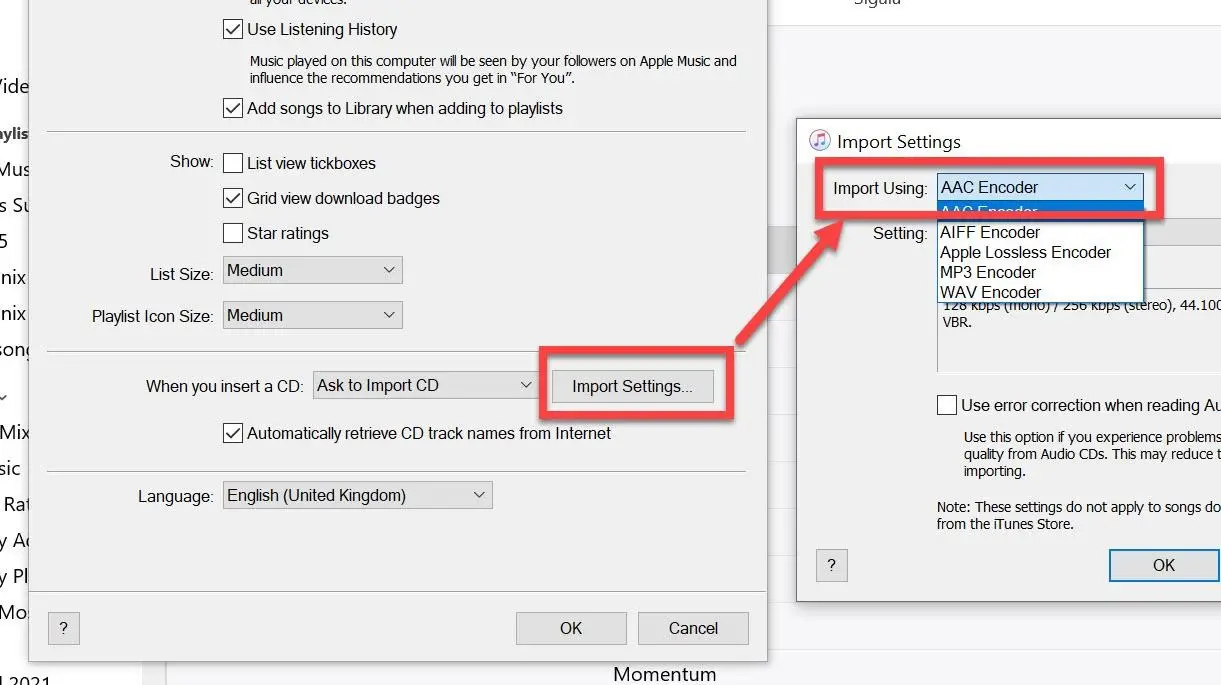
Your CD rip settings are incorrect if you didn’t see the Create AAC version option in step 3. Select Preferences from the Edit menu to make changes.
In the drop-down option that appears next to “Import using:,” choose AAC Encoder by clicking Import Settings… right after you click “When you insert a CD.”
Reset start & stop times
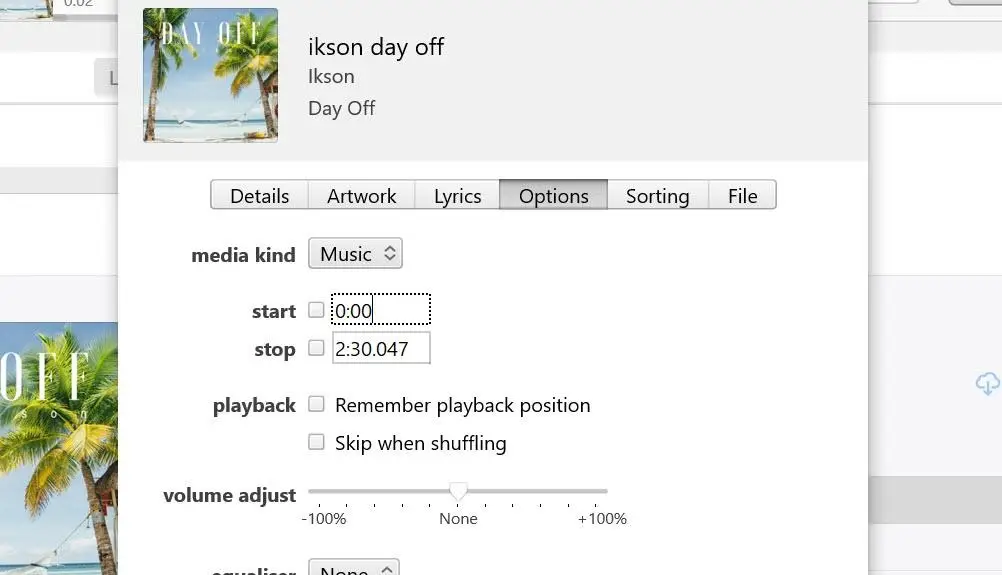
For maintenance purposes, right-click on the song’s original album after selecting it with the mouse. Then click the Options tab after selecting Song Info.
To reset the start and stop timings to their original times, uncheck the boxes now and click OK.
If not, just the portion of the song between your start and stop times will be played when that track is played in the future. That is probably not what you want to happen.
Find the new AAC file
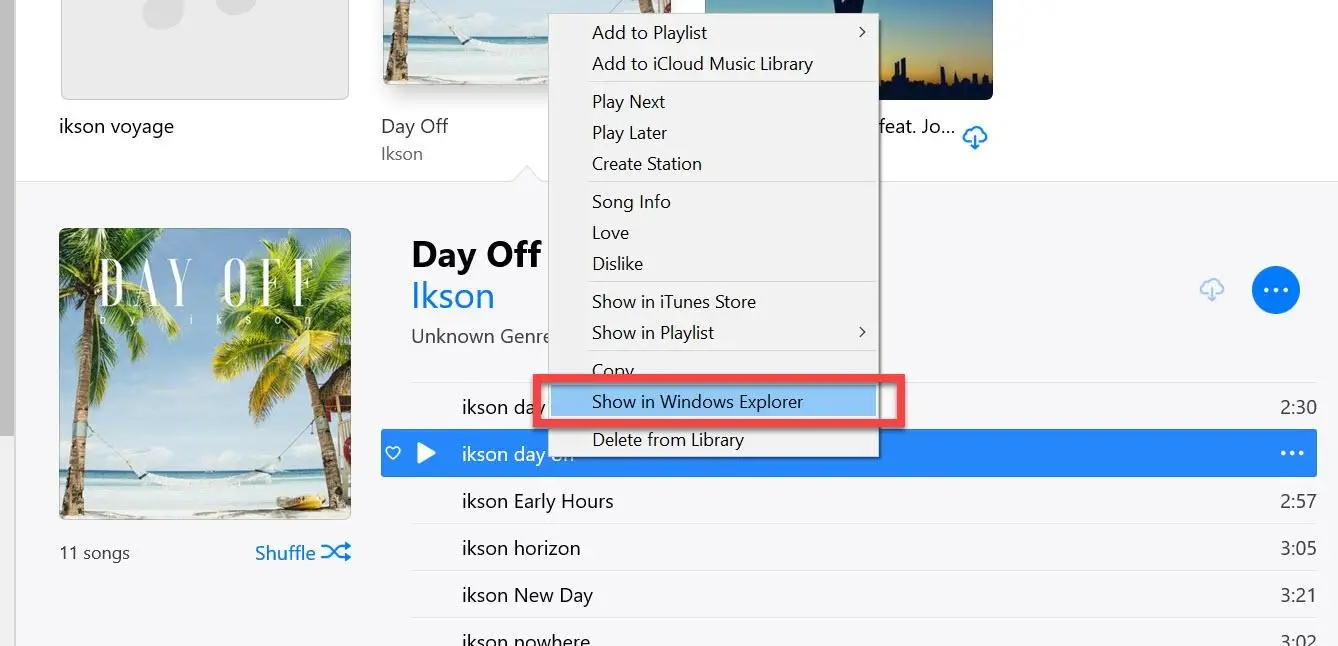
Go to the duplicate track you want to use as a ringtone (or the duplicate album that contains the freshly produced track).
Choose Show in Windows Explorer from the context menu when you right-click on the album’s song. Show in Finder is the name of the option if you’re using a Mac.
This is necessary so that you may modify the file’s extension (making it a ringtone), which we’ll perform in the following step.
Change the file extension
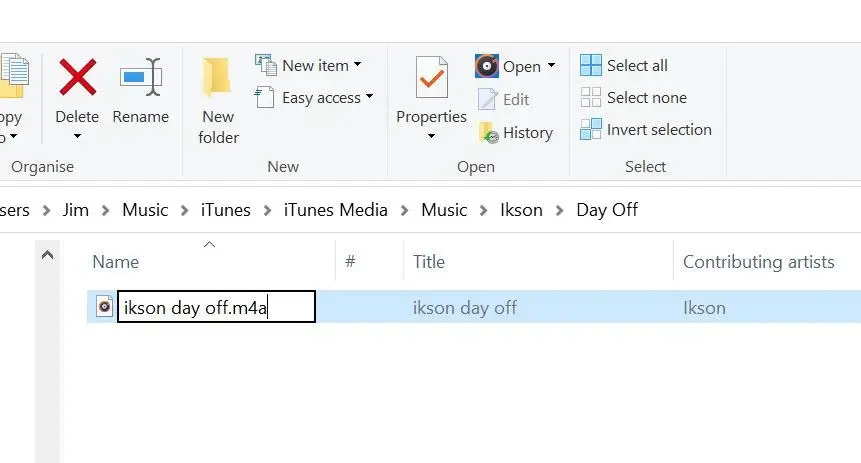
Now that the window has opened, the file should be highlighted and have the filename something.m4a, where “something” is the name of your music.
If you just see “Ikson day off” and not “Ikson day off.m4a,” it’s likely because Windows is configured to conceal extensions. How to display the file extension for editing is shown below.
Right-click the file once you can see the m4a section and select Rename. Now switch the extension from.m4a to.m4r and hit the Return or Enter key or just click a blank space.
The procedure is quite comparable on a Mac, and you’ll receive a warning asking if you’re sure you want to change the extension on both Windows and macOS. On Windows, select Yes, and on a Mac, click “Use.m4r.”
When prompted to modify the extension, select Yes.
Please be aware that you cannot just add.m4r to the filename when renaming it, as this is a step that confuses many people. All you’re doing is renaming your file from “Ikson day off.m4a” to “Ikson day off.m4r.m4a” if Windows hides file extensions.
This won’t work at anyway!
Import & sync ringtone
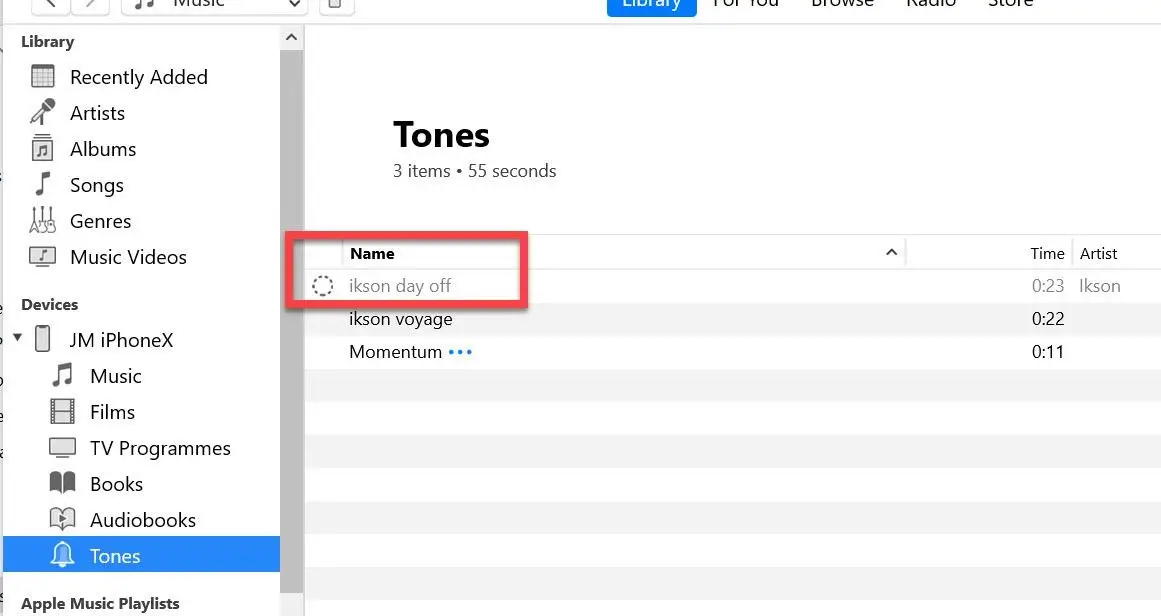
In version 12.7, Apple reduced the bloat in iTunes by deleting the App Store and a number of other features, including Tones, which was where you could view all of your ringtones with ease.
However, using the most recent version of iTunes, you may still sync your new ringtones to your iPhone.
Connect your iPhone to your computer, then drag the new ringtone from the Windows Explorer window into the Tones folder in iTunes. Following that, it ought to appear on your iPhone in the ringtones category.
Switch to the new ringtone you just made
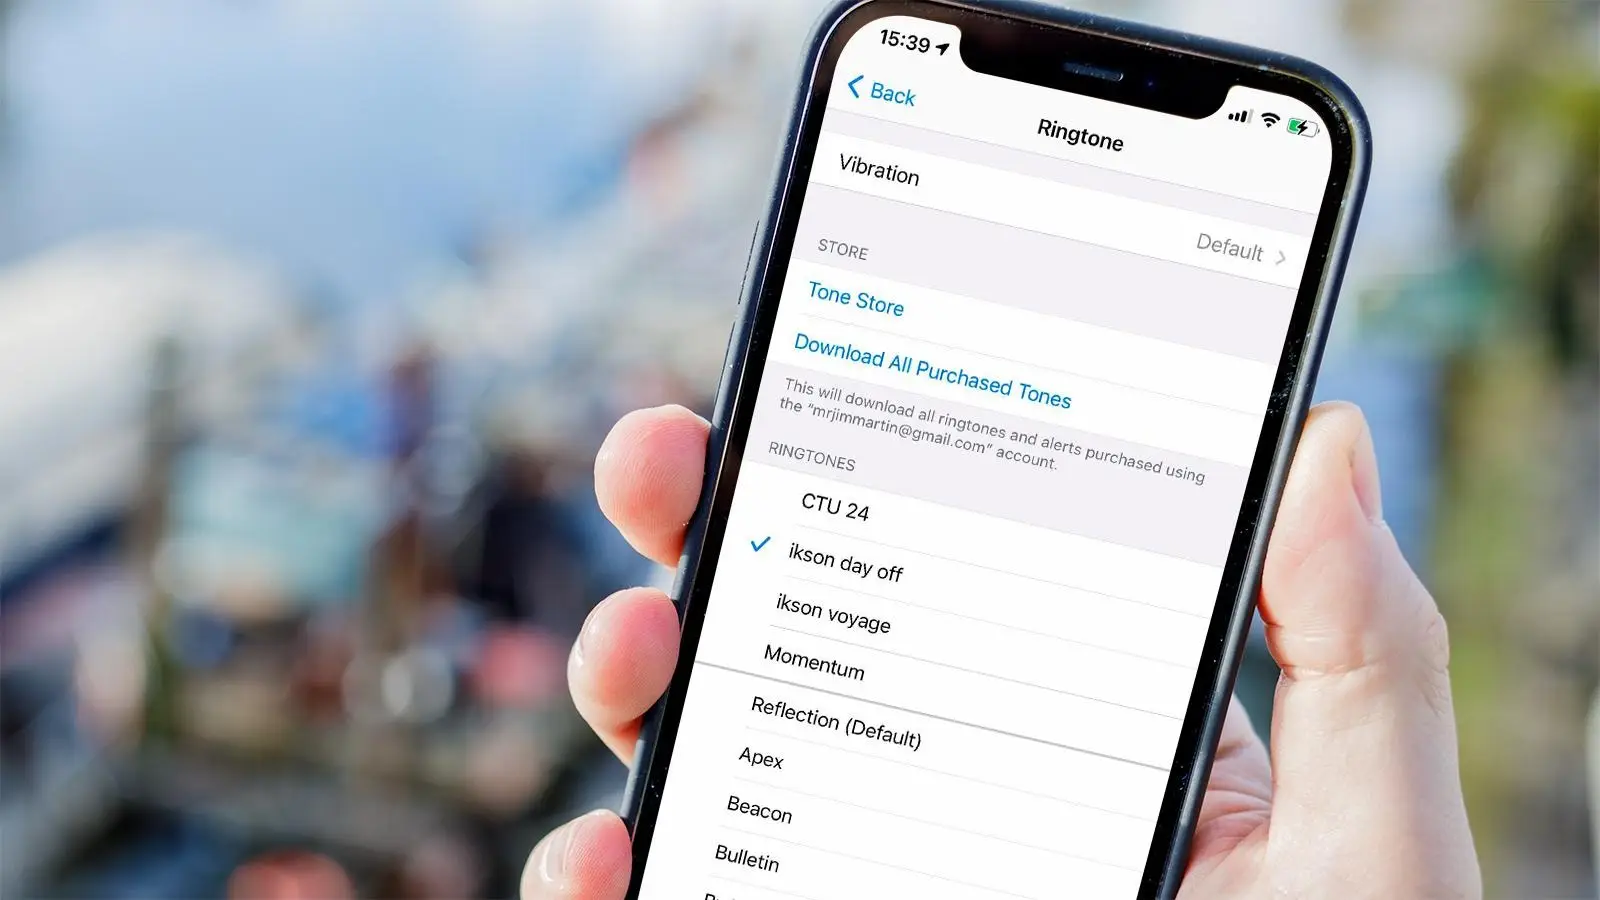
You only need to set the new tone as your ringtone now that it is on your phone.
Open the Settings app on your iPhone, select Sounds (commonly known as Sounds & Haptics), and then select Ringtone to do this.
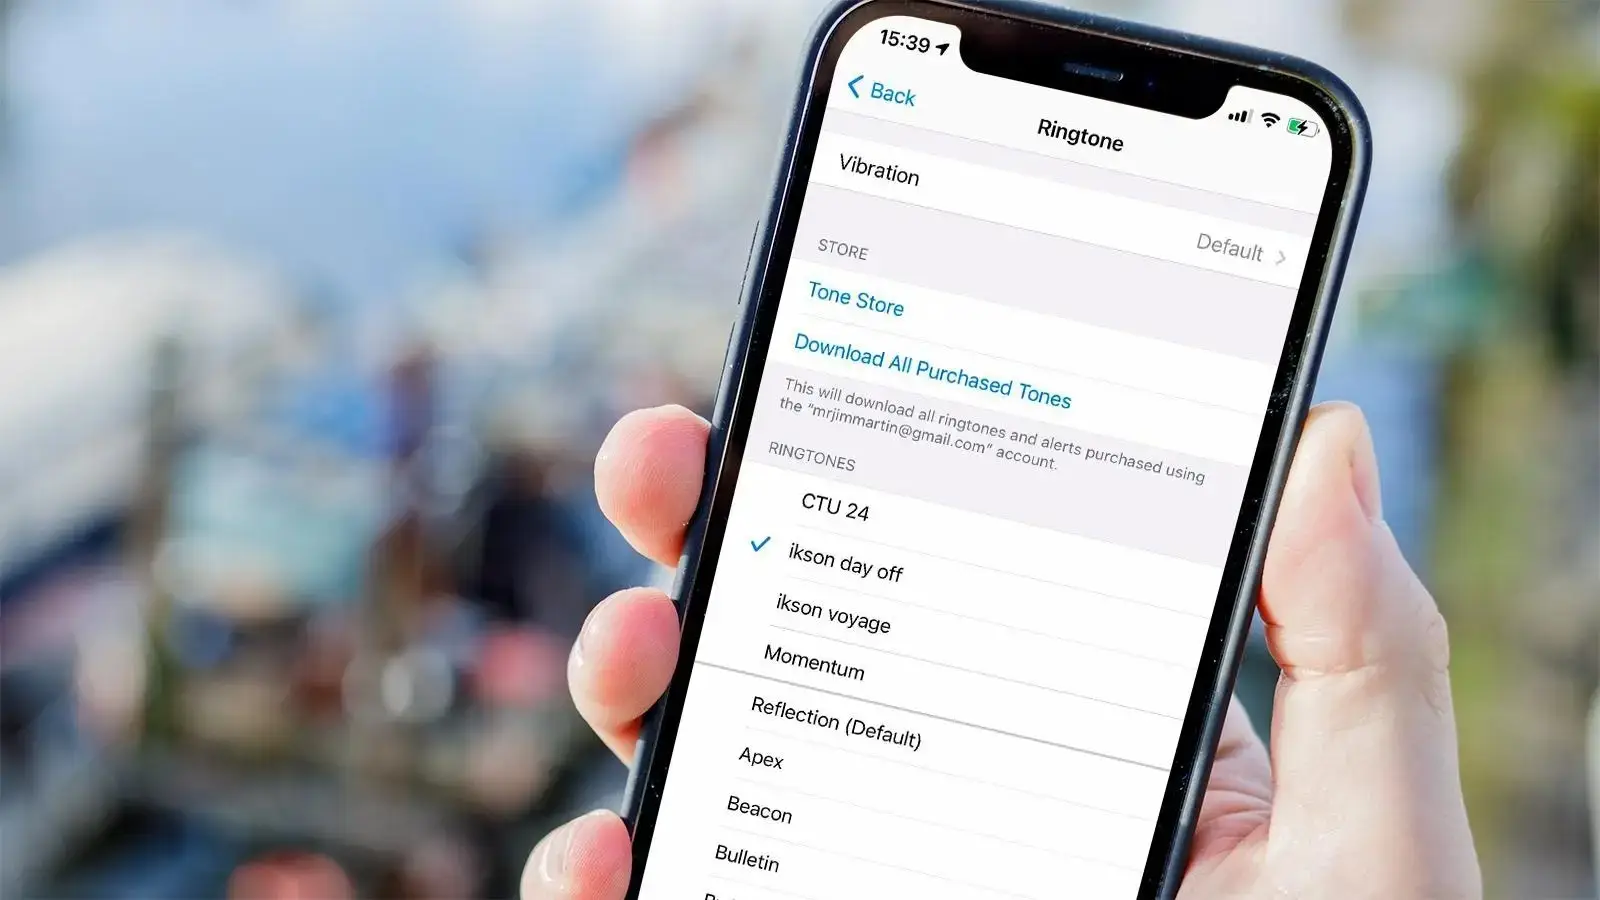
Your own tones will be displayed above the default ringtones at the top of the list. To make one your ringtone, simply tap on it.
You may utilize your own tones for other things like text message notifications or anything else, so the fun doesn’t end there.
There you go! That’s all you know how to download free ringtones to IPhone. We hope you enjoy your new, totally free iPhone ringtones!


